Showing posts with label Ranger Distress Inks. Show all posts

Wednesday, November 2, 2016

Sneak Peeks Of November Kits At My Creative Scrapbook

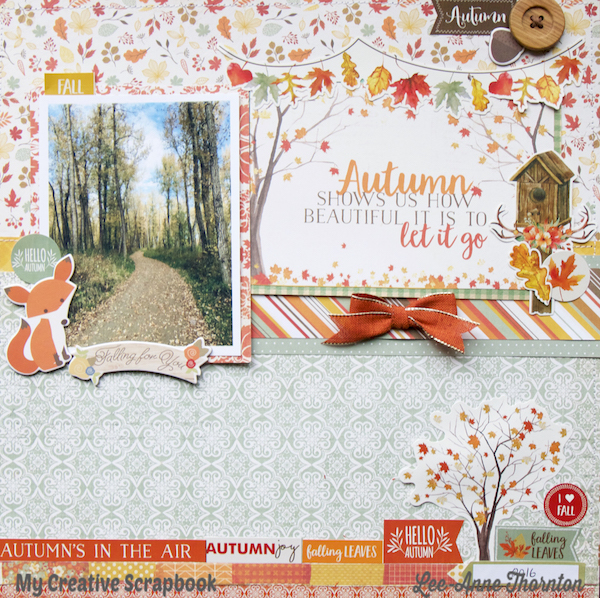
Hello friends! Well it's a busy day on my blog today. It's sneak peek day of all the November kits at My Creative Scrapbook and they are all beautiful kits again this month.  I was given the November Main Kit and the November Creative Kit to create with.  Here are two of my layouts that I can share today.

Layout created from the November Creative Kit

Layout created from the November Main Kit

I love the kits! Such beautiful colors for any autumn project.  Here are sneaks of all the November kits:

November 2016 Main Kit

November 2016 Creative Kit
November 2016 LE Kit

November 2016 Album Kit
Be sure and reserve your kits today at My Creative Scrapbook.  The full reveal is November 5.


Have a great day!


Thursday, September 15, 2016

ABC Layout

Hello friends! Today I am sharing a school themed layout at Just Nick 
Digital Cut Files using the Online Alpha cut file on the white card stock background.


I decided that I would use my Silhouette sketch pens for my layout so I took the Silhouette Cameo blade out and replaced it with a black sketch pen and let the Silhouette Cameo draw the design onto the white card stock.


Once it was drawn, I wanted to add some color to the alphabet so I inked the letters with different colors of Ranger Distress Ink (Faded Denim, Squeezed Lemonade, Tumbled Glass, Citron, and Barn Door).  I embellished the outside edges of the layout with cute crayon puffy stickers from Paper House Productions.  


I used the Outline Alpha Cut File for my layout.


I love using my sketch pens.  Be sure and check out all the designs at Just Nick Digital Cut Files.  Thanks for stopping by.

Thursday, April 28, 2016

Father Layout

Hello friends! Today I am sharing a layout of my husband and son on the A Flair For Buttons blog.
I love this photo of my husband and son when my son was a newborn.


For this layout I used 3 flair buttons from 3 different sets of flair.  


I created the cut file and cut it on my Silhouette Cameo and backed the negative space alphas with a navy piece of card stock and also added the red and white star paper behind some of the words that said "father".  To give it more dimension and shadow, I added small adhesive squares to the backside of the cut out negative alphas.


I used the Faded Denim and Aged Mahogany Distress Inks by Ranger and my water brush to create a watercolor effect on the white card stock.


to make the flair buttons stand out more, I added some navy sewing thread around the flair.  I like the texture it gives the layout.


For the title "father" I used a Ranger Distress Pen in Pumice Stone to outline the letters and make them stand out more.  


This layout was inspired by Ashley Horton's Texture Techniques class.

These are the sets of flair that I used on my layout:


Be sure and check out all the flair in the A Flair For Buttons shop.  There are so many to choose from.

Thanks for stopping by and I hope you enjoyed your visit.  Happy creating!


Friday, March 18, 2016

Creating Backgrounds With Distress Inks

Hello friends! Today I wanted to share some tutorials on how I created four different backgrounds for my layouts with distress inks. The layouts were created using the March Main Kit from My Creative Scrapbook.

For the first layout, I began with the Ranger Tattered Rose and Victorian Velvet Distress Ink Pads and used the left edge of each of the distress ink pads and pressed down and swiped in short swipes.


Here is the completed layout for this technique:


For the second layout, I created a horizontal striped background by simply using the Ranger Tattered Rose Distress Ink Pad swiping the ink pad flatly across the white cardstock as shown below.


Here is the layout that I created with the horizontal striped technique.


For the third technique, I began with six colors of distress inks.
Ranger Tattered Rose, Victorian Velvet, Tumbled Glass, Scattered Straw, Worn Lipstick and Peeled Paint


I began with the Peeled Paint Ink Pad and began at the top edge and dabbed the ink pad with the top edge of the ink pad across the 12X12 white cardstock, as shown, until it was randomly stamped across the entire page.


I added the second color, Scattered Straw using the same technique


Next I used the Worn Lipstick


Then the Tumbled Glass Ink Pad


Followed by the Tattered Rose Ink Pad


Finally I added the Tumbled Glass Ink Pad


Here is the completed layout:


The fourth technique with distress inks is a faux woodgrain background.  I love this technique.  I began with a scoring board and a 12X12 sheet of white cardstock and Ranger Tattered Rose Distress Ink.  If you do not have a scoring board, a ruler and a bone folder will also work.  Begin by placing the white cardstock in the scoring board and scoring lines every two inches or whatever width is desired.  I chose a width of two inches for my layout.  


I swiped along the scored lines from left to right placing the entire surface of the ink pad flatly along the surface.


My ink pad is not saturated with ink and is fairly dry, but I didn't want the color too saturated.  


Here is my layout with this technique.


I hope you have enjoyed these tutorials and remember that practice makes perfect.  It makes the kit stretch a little further too.  Have a creative day!