


I made this card for the tutorial.
You will need these supplies:
12X12 White Card Stock
Tape Runner Adhesive
Bone Folder
Papers from the Main Kit (as shown)
3 Inch Square Paper Punch

Punch out six squares of pink paper with the paper punch.


After the six squares are punched, score the squares with the bone folder about 1/4 inch on the left and right side of the square as shown.


After scoring, fold over the paper

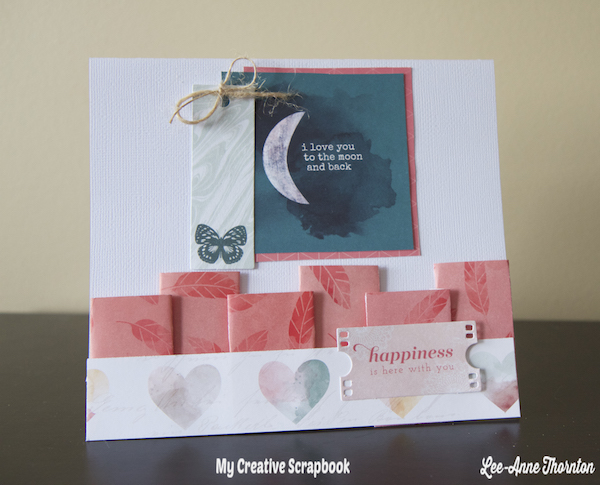
Starting on the right side of the white cardstock, adhere the pleats as shown being sure to stagger them.


When they are adhered down add the heart paper strip and adhere to the bottom edge of the white card stock.


Check out the dimension of the pleats

To assemble the card, cut down the paper strip with a paper trimmer so it is flush to the left hand side of the pleats and heart paper strip.

Add the "I Love You To The Moon And Back" paper card and mat it with a scrap piece of pink paper. Add the butterfly die cut, as shown, and adhere them down. Tie a bow with some string. Add the "happiness is here with you" diecut and adhere.
The card is now complete!

No comments:
Post a Comment