Sunday, July 16, 2017

Love Summer Memories


Hello friends! I hope you are enjoying your weekend.

I am in summer mode at the moment and it's so awesome to have some lazier days and sunshine. Last year I renovated my outdoor space by adding some new outdoor furniture, privacy glass, a huge patio umbrella and a funky rug and it's now my favorite place to hang out with my family, friends and my dog and cat. That is what this layout is all about.


I had a layout published in the summer issue of Scrapbook And Cards Today Magazine and the lovely Catherine gave me the Summer Days collection kit from Simple Stories so I wanted to break it out and create something fun. I also used the Follow Your Heart cut file from The Cut Shoppe, which I cut on white cardstock with my Silhouette Cameo and backed it with lots of patterned papers. It truly is my favorite thing to do in scrapbooking. It takes time and patience, but the result is so worth it. The papers went perfectly with my photo of my red furniture and red toes.


I added three flair buttons from A Flair For Buttons, I love being on this design team because flair buttons are my favorite embellishment and Shelley always has such a huge selection of flair buttons to work with any page.  I chose the red heart flair button from the Just Hearts Flair 2 set to add to the left of my title.


I also added the flair button "the best summer of my life" from the Say Hello To Summer Flair set as well as the "keep calm and enjoy summer" flair button, which is also from the Say Hello To Summer Flair set. 


I love the bright striped washi tape from Simple Stories and added it below the photo and folded it back and forth to create a ruffle


and I also added a long strip to the bottom of the layout as well as several word and tab stickers above the washi tape strip. Finally I added some journal strips.


Finally to complete the layout, I  added some enamel hearts and an enamel arrow from Pinkfresh Studio. 


It was really fun to create a bright, happy, and fun summer layout because that is what summer should be is happy and fun. 

I hope you are having fun this summer. Thanks for stopping by my blog. Have a great day!


Cut File Used On Layout

Follow Your Heart - The Cut Shoppe

Flair Buttons Used On Layout
Just Hearts 2

Say Hello To Summer 


Thursday, July 13, 2017

Summer Fun Layout

Happy Thursday! It's in the middle of summer here and it's been very hot so far this summer, but I am not complaining as the winters here are so long. Today I thought I would share another summer layout that I created with the gorgeous July Creative Kit at My Creative Scrapbook.


Scrapbooking to me should be fun and for this layout, I wanted to create some movement on the layout and make it more playful. 

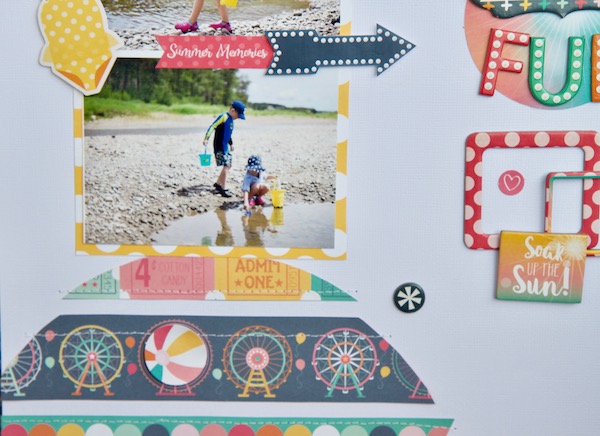
I grabbed one of my dinner plates to use as a circle template and the border strip paper from the kit and traced out a circle with a pencil and then cut the paper strips apart.  I added some to the bottom left corner of the layout and the top right corner of the layout and machine stitched them down onto the white cardstock background.


I matted the photos onto the yellow and white polka dot paper


and added the chipboard yellow swimsuit and the "summer memories" sticker and "arrow" sticker in between the two photos to separate the photos and to draw the eye to the clustered title to the right of the photos.


From the ephemera pack in the July Creative Kit, I added the sun circle and layered it with the "summer" and "fun" chipboard pieces to complete the clustered embellishment title. I added a swimsuit chipboard piece to the right of the title.


The cute chipboard frames were combined and I clustered the "flamingo" chipboard piece to the right of the chipboard frames and added the "soak up the sun" chipboard piece to the bottom of the frames. I love to cluster embellishments and give the title more of a wow factor.


Finally, I sprinkled some tiny round ephemera pieces and round chipboard embellishments around the layout.


As you can see, I wanted to draw the eye from the bottom left corner of the layout upwards to the photos and then over to the top right hand corner of the page and then downwards to the title.

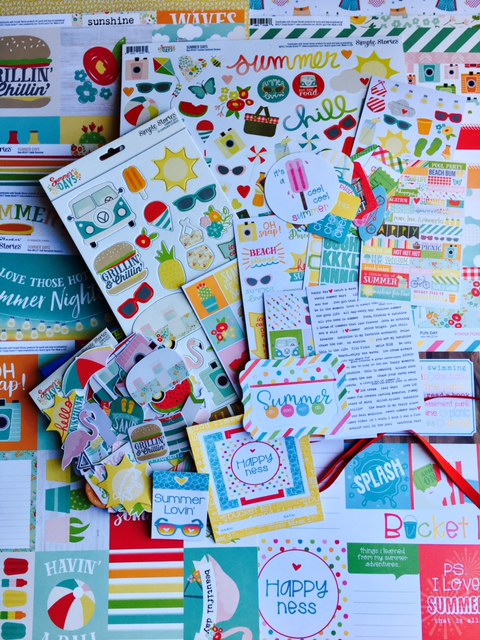
Feast your eyes on the beautiful July Creative Kit.


It is full of gorgeous papers, ephemera, stickers and chipboard stickers from the new Echo Park Summer Dreams line. I love the colors to this line. They are so bright and happy. 

Be sure and check out all the beautifully designed kits that My Creative Scrapbook puts together each and every month. There will surely be a kit that is perfect for you and your particular paper crafting style as they are all so different and jam packed with the latest and greatest papers and embellishments in the paper crafting industry.

Enjoy your day!


Wednesday, July 12, 2017

Designer Challenge At Creative Scrapbooker Magazine

Happy Wednesday! Creative Scrapbooker Magazine invited three designers, Kerry Engel, Tracy McLennon and myself, to participate in a challenge with Multicraft's Forever In Time collection. Here are the products all three of us designers were given to create with.


I was instantly drawn to the pink, yellow and blue cardstock and knew I wanted to create a layout of my daughter and I.


A lot of my layouts begin with a white cardstock background and with the pink, blue and yellow cardstock that I was to create with, I thought it needed a white background to make the colors pop off the page without making it too overpowering and to give it a clean look.  

I really loved the dimensional paper flowers in the kit so I decided to cluster some on the top left and bottom right corner of the layout. Since this is a layout of my daughter and I, the puffy sticker "girlpower" seemed perfect to add to the layout.  


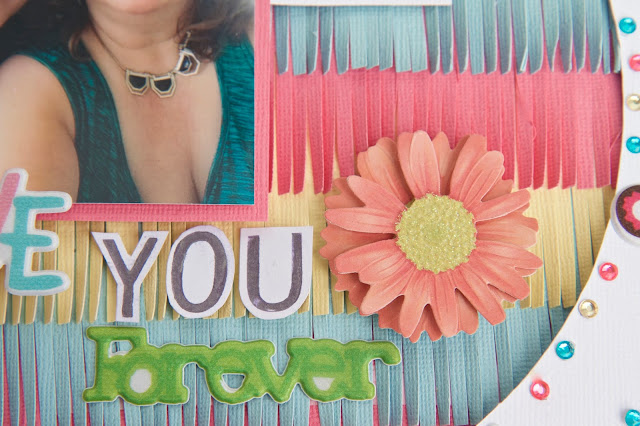
I cut out a 7 1/2 inch circle with a circle cutter on the white cardstock and then I put my fringe scissors to work. I cut some 2 1/2 inches by 12 inches strips of pink, blue, and yellow cardstock and cut fringe 1 1/2 inches from the bottom. This left a one inch area above the fringe to adhere the strips one on top of the other with my ATG gun. Then I carefully added the glued paper strips to the backside of the white cardstock circle and then adhered it with another piece of white cardstock to make the backside of the layout clean and tidy.


I matted the photo of my daughter and I with a piece of the pink cardstock. To make the clear sticker "there is sunshine in my soul today" pop, I backed it with some of the blue cardstock from the kit and added the pink "hello" puffy sticker to the left of the photo and popped up the clear sticker with some dimensional adhesive squares.


The title of my layout was created with the "love" puffy sticker, the "forever" puffy sticker and the "you" was created with some white cardstock, the stamps in the kit and the purple brush pen. I simply brushed the purple pen onto the y, o, and u alphas and stamped on the white cardstock and fussy cut them out and used dimensional foam squares to pop them up more. Again, dimensional paper flowers were added on the left and right side of the title. On the right side of the photo, I added the "memories" puffy sticker and a piece of white cardstock that I typed "Shannon & Mom".


Around the circle, I added blue, pink, and light yellow jewels in increments of four and added some puffy stickers in between. Don't you love the teapots and donuts? 


To complete the layout, I added some coordinating jewels to the top left corner and bottom right corner of my layout to draw the eyes diagonally down the page and simply typed the date on a piece of white cardstock and again clustered some of the dimensional flowers.


I love the texture and dimension of the layout and fell in love with the happy colors.


This was a fun challenge and it was so fun to see what the other two designers came up with using the exact products. I love how everyone's creative brain works differently.  Check out their layouts on the Creative Scrapbooker Magazine's blog.

Thanks for stopping by and have yourself a nice, happy day!


Sunday, July 9, 2017

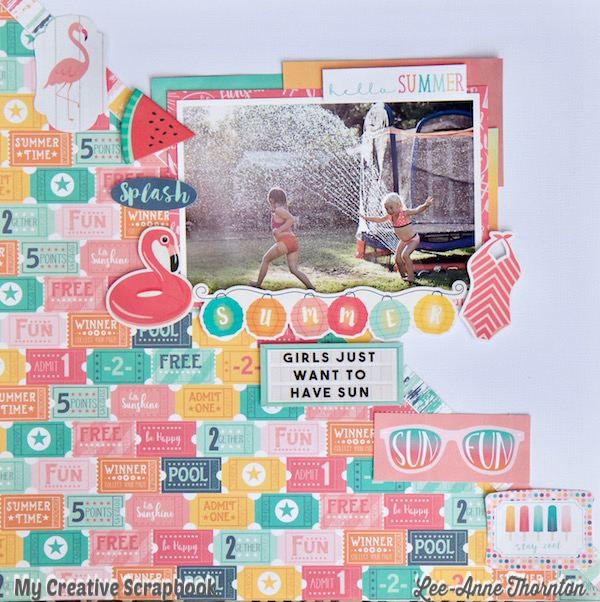
Girls Just Want To Have Sun

Hello friends! I thought I would share another layout that I created with the July Creative Kit at My Creative Scrapbook.


This kit is so fun and the colors are gorgeous. The embellishments and stickers are perfect for summer. Who couldn't resist those flamingos, which are very trendy at the moment.  


Be sure and check out this kit 

My Creative Scrapbook July Creative Kit

and all the kits for July here and order yours today.

Have a great day!

Thursday, July 6, 2017

Tutorial - Create A Mixed Media Background For A Layout

Hello friends! Today I am sharing a tutorial on how I created the mixed media background that I created on white cardstock for this layout. This was one of my July layouts with the My Creative Scrapbook's July Creative Kit. This kit is so colorful. I love the summery colors of these papers that are from the Summer Dreams Collection by Echo Park and so I wanted to create a background that would coordinate with these papers.


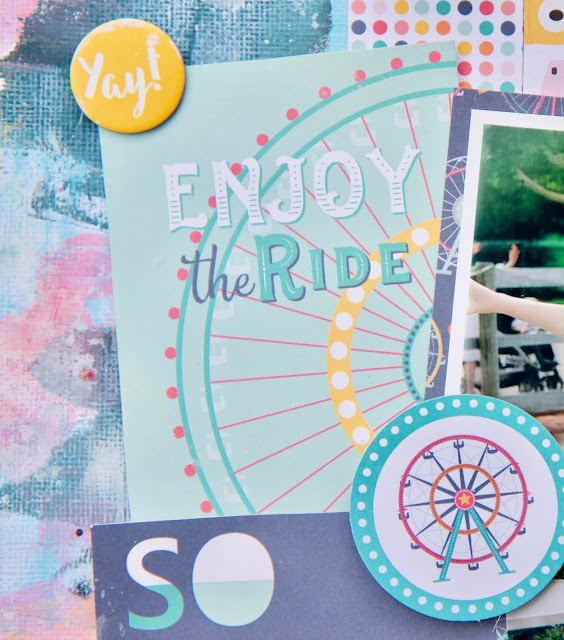
It is fun to sometimes play and get messy with paints and sprays and create something a little more artsy for a background.  For many of my layouts, I tend to use white cardstock for my background and add the patterned papers on top of it. I love the clean look but I occasionally like to get creative and create a one of a kind artsy background. Here are some more closeups of the layout:


To create the background for this layout, you will need:

Supplies
  • 1 sheet of 12 X 12 white textured cardstock
  • Craft mat
  • Clear gesso (I use Liquitex)
  • Heat gun or hair dryer
  • White gesso (I use Liquitex but white acrylic paint will also work)
  • White modeling paste (I use Liquitex)
  • An old or expired credit card or gift card (to spread the modeling paste)
  • Heidi Swapp Colorshine Sprays in gold, navy, primrose and teal
  • Ranger Distress Stain in Picket Fence
  • Wide bristle artist paint brush or sponge brush
  • Palet knife
  • Paper towel 
  • Paper trimmer
  • A piece of packaging (cellophane)

Instructions

With a paper trimmer, trim the white cardstock to measure 11 1/2 inches on all four sides.

With a paint brush or sponge brush apply clear gesso to the white cardstock. Dry with a heat gun.


Scoop approximately one tablespoon of modeling paste onto a craft mat with the palet knife


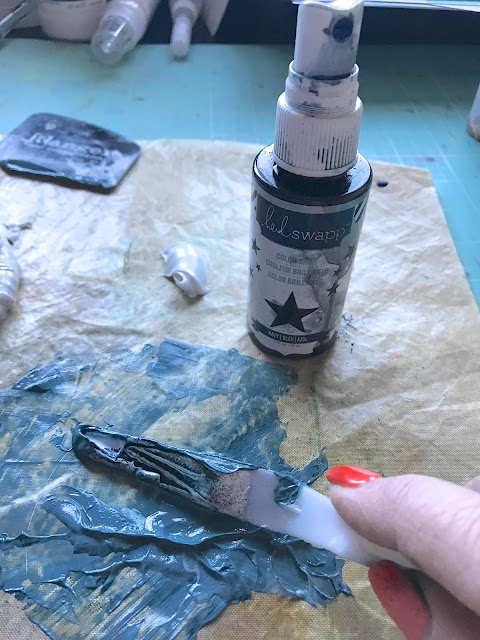
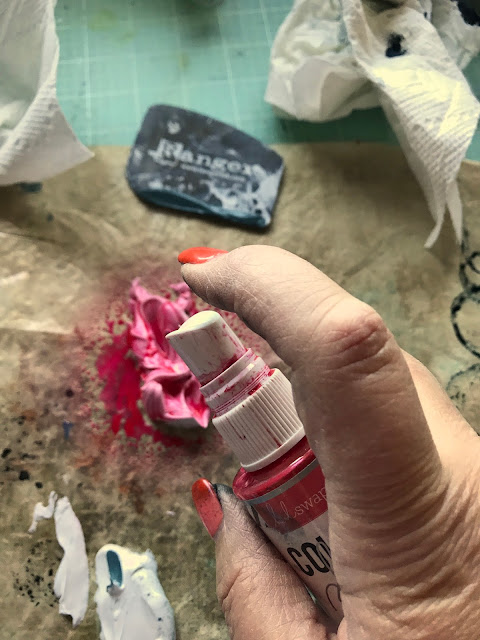
Spray the modeling paste generously with the Heidi Swapp Colorshine Spray to the desired shade and stir with the palet knife to combine it well with the modeling paste


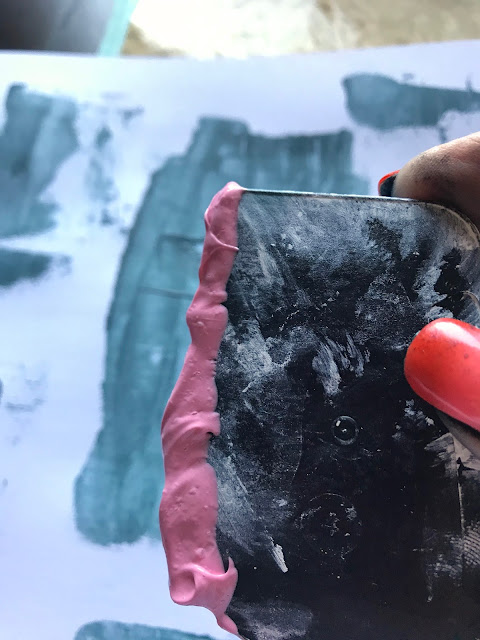
Add some colored modeling paste to the bottom edge of the plastic card and apply to the white cardstock as shown by sort of scraping the modeling paste on the page


With the same shade of modeling paste, apply to several areas of the white cardstock.


Dry with a heat gun well before adding other colors of modeling paste. 

Continue applying each color of modeling paste and drying in between each color change with a heat gun.


I wanted to tone the colors down because I thought it was too busy so I applied some white gesso onto my craft mat and with my finger spread it around the page in a circular motion and let it dry


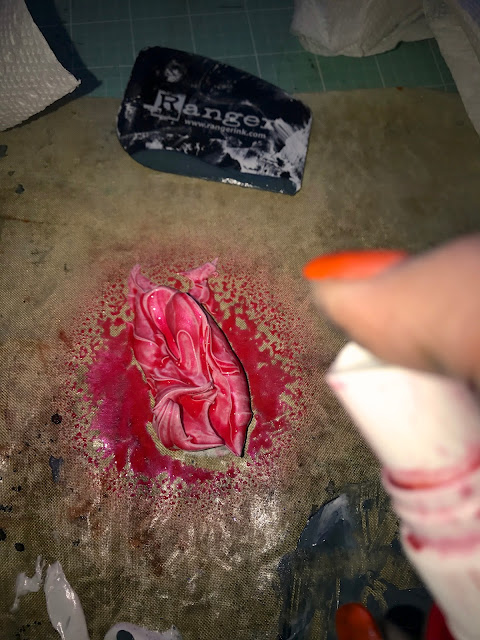
 After the white gesso was applied and dry, I applied some Ranger Distress Stain in Picket Fence by dabbing it onto a piece of clear cellophane and "stamping" it randomly around the page

Once I was happy with it, I splatted some Heidi Swapp Colorshine Spray in navy and primrose around the page and let it dry well


Finally I added some machine stitching around the edge of the cardstock. Stitching is totally optional. I prefer to add stitching to many of my layouts because I love the homespun feeling and texture it gives to my pages.

Adhere it to the navy plus sign patterned paper from the July Creative Kit. The background is now complete. 


Mixed media is all about layering colors and textures and just having fun. 

I hope you enjoyed this tutorial and give mixed media a try. I find it is so much fun to let loose and get messy. It really is freeing.

Thanks for stopping by and have a great day!