Thursday, December 24, 2015
Merry Christmas!
Hello friends! I just wanted to wish you all a very Merry Christmas and hope that you are blessed with all good things this season.
It is going to be a quiet one in my home this year. My adult children and their spouses are celebrating with their other families and my husband is working this entire week. My little family consisting of my sixteen year old son, my hubby and I celebrated our Christmas a few days ago. That's okay because I am thankful that my boy is happy and healthy again. My youngest son has been ill since September and it's been quite difficult to say the least. He is smiling and laughing and joking so I know he is feeling a lot better and that's the best gift a mother could want.
I am thankful that my parents are here to celebrate this season with so I will be making a turkey dinner with all the fixings on Christmas Day for them and my son and also play some games and cards after dinner.
Reflecting on this season, I have realized that I wish the Christmas spirit could be every day of the year. I love to see strangers be kind to one another and put others before themselves. I love to see the generosity that people have by donating gifts and toys to people that are struggling and donating to the food banks. My goal is to make this generosity and spirit last throughout the year next year. It's been a trying year for so many people in my area with the economic downturn in the oil and gas industry.
Thanks for stopping by my blog and following me. I love what I do and love to inspire people to take time for what makes them happy.
My husband bought me a special tripod for my camera so that I can begin creating some process videos of my scrapbooking and crafting. It's a new challenge for me for 2016 so I hope you will follow me in the new year. I have a few scrappy goals for 2016 and also have some new design team news that I will be sharing on January 1 so I hope you will come back and visit then.
Enjoy the season. See you all in 2016!
Sunday, December 20, 2015
Rustic Ribbon Tree And Tutorial
Hello friends! Today I am on the A Flair For Buttons blog sharing my Rustic Ribbon Tree.
Are you all prepared for the holidays? I am off to a slow start this year but try to find some time to do some crafts. I find it is a great way to take a break from all the hustle bustle of the season, put on some festive music with a hot mug of apple cider and create. I am sharing a tutorial on how to make one for a gift or for your home.
YOU WILL NEED:
A pair of scissors to cut ribbon
1- 3 7/8 inch X 8 7/8 inch foam cone (mine was from Michael's, but I have seen them at Wal-mart)
4 spools of ribbon (I used 2 - 5/8 inch wide and 2 - 7/8 inch wide ribbon in 3 yard spools) in coordinating colors (I got my ribbon on sale for 70% off at Michael's).
A hot glue gun and glue sticks
One flair button for the top of the tree (I used the red trees from the Joy Flair Set at A Flair For Buttons)
 |
| Joy Flair |
INSTRUCTIONS:
- Cut four inch lengths of four coordinating ribbons. You will need quite a few to complete the tree.
- Fold the four inch pieces of ribbon in half to form a loop.
- Beginning at the bottom of the foam cone, hot glue the looped ribbon pieces going around the foam cone layer by layer. As you can see, my tree has six layers of ribbon. If you don't have a glue gun, straight pins would work well too.
- After all the layers are completed and there are no bare spots, tie a bow and glue it to the top of the cone.
- Hot glue the flair button to the middle of the bow.
- The tree is now complete!
I am a slow crafter so this tree took me about an hour and a half to complete and only one burn on my hand. Ha!
I hope you enjoyed the tutorial and are inspired to make some ribbon trees for your home or for gifts.
Thanks for stopping by and happy crafting!
Thanks for stopping by and happy crafting!
Saturday, December 19, 2015
A Mini Envelope Tutorial For My Creative Scrapbook
Hello friends! Today I wanted to share a quick tutorial on how to create mini envelopes.
I recently was a guest designer over at My Creative Scrapbook and was asked to create some layouts using the beautiful December Main Kit.
When I saw the vellum papers in the kit, I thought they would be great for making some miniature envelopes to add some embellishments or use as an advent calendar.
To create these envelopes you will need:
A mini envelope paper punch or a template (I used a paper punch for mine)
Scissors
Liquid glue
A bone folder
A strong adhesive. (I used my ATG gun to adhere the back of the mini envelopes to the background paper)
To being my project, I punched 25 mini envelopes, some with the striped vellum and some with the dotted vellum.
I took my bone folder and scored across the the fold where the top flap would fold, one on the left hand flap, one on the right hand flap and the bottom flap. I folded all the flaps on the fold lines toward the middle as shown below.
I added a dab of liquid glue and and secured the flaps as shown below.
I chose to keep the upper flap open so something can be tucked inside. The envelope is now complete.
On my layout, I spaced the envelopes evenly on the background paper alternating striped envelopes and dotted envelopes adhering them to the background paper with my ATG tape runner. As you will notice, I also added one mini envelope to the top right hand corner of the photo.
If you don't have a mini envelope paper punch, Here is a photo of the shape of the envelope when it is folded. It measures 1.5 inches high by 1.5 inches wide. Simply hand draw this shape and cut it out with some scissors.
I recently was a guest designer over at My Creative Scrapbook and was asked to create some layouts using the beautiful December Main Kit.
When I saw the vellum papers in the kit, I thought they would be great for making some miniature envelopes to add some embellishments or use as an advent calendar.
To create these envelopes you will need:
A mini envelope paper punch or a template (I used a paper punch for mine)
Scissors
Liquid glue
A bone folder
A strong adhesive. (I used my ATG gun to adhere the back of the mini envelopes to the background paper)
I took my bone folder and scored across the the fold where the top flap would fold, one on the left hand flap, one on the right hand flap and the bottom flap. I folded all the flaps on the fold lines toward the middle as shown below.
I added a dab of liquid glue and and secured the flaps as shown below.
I chose to keep the upper flap open so something can be tucked inside. The envelope is now complete.
On my layout, I spaced the envelopes evenly on the background paper alternating striped envelopes and dotted envelopes adhering them to the background paper with my ATG tape runner. As you will notice, I also added one mini envelope to the top right hand corner of the photo.
If you don't have a mini envelope paper punch, Here is a photo of the shape of the envelope when it is folded. It measures 1.5 inches high by 1.5 inches wide. Simply hand draw this shape and cut it out with some scissors.
I hope you enjoyed my tutorial and have fun making some mini envelopes. Have a great day!
Thursday, December 17, 2015
December Sketch At My Creative Scrapbook!
Hello friends! I just wanted to share with you a scrapbooking sketch over at My Creative Sketches (The My Creative Scrapbook sketch blog) that you can create with and also have a chance to win this prize from My Creative Scrapbook.
Simply create a layout using this sketch and link it up at the My Creative Sketches website here by January 14, 2016 EST Midnight. It is a random draw and the winner will be announced January 15, 2016.
Enjoy the sketch and looking forward to seeing what you create. Have a creative day!
Lots of awesome goodies don't you think? Isn't it a great sketch?.
Simply create a layout using this sketch and link it up at the My Creative Sketches website here by January 14, 2016 EST Midnight. It is a random draw and the winner will be announced January 15, 2016.
Enjoy the sketch and looking forward to seeing what you create. Have a creative day!
Monday, December 14, 2015
Day 10 Of The 14 Days of Holiday Giveaway
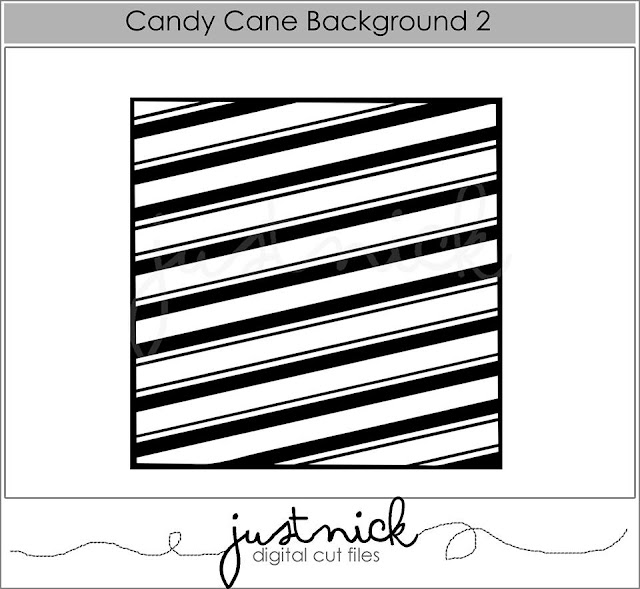
Hello friends! So glad you stopped by because it's Day 10 of the 14 Days of Holidays Giveaway and each weekday from December 1-18, 2015 there is one FREE cut file to download for that weekday only until midnight CST. For Day 10, I am sharing a layout on the Just Nick Digital Cut Files blog using the fabulous Candy Cane Background.
When I saw this cut file I knew immediately what I wanted to create with it. I wanted to create something festive and also something winter themed of these cuties who melt my heart.
When I saw this cut file I knew immediately what I wanted to create with it. I wanted to create something festive and also something winter themed of these cuties who melt my heart.
First I cut out the cut file on white card stock and machine stitched around the white card stock background with red thread to make it really pop. After that was completed, I took a piece of red patterned paper and backed the design. I used the Carta Bella All Bundled Up Collection for this project.
I love vellum and I wanted some snowflakes on my layout so I chose the Snowflake Background, cut it out on a sheet of vellum with my Silhouette Cameo, and then hand cut some snowflakes apart so I could use them on several projects. This is another way to use the cut files and keep some for another project. I tucked the snowflakes here and there on my layout and added some stickers and sequins to the middle of each one.
For my title "Snow Magic", I used the words "snow" and "magic" from the Holiday Words cut file and cut them on white card stock and placed them on the layout as shown.
To give more dimension to the layout, I cut out the snowflake overlay from the Holiday Card Overlay 1 cut file on some white card stock and popped them up with foam squares to add some shadows. Adding some flair buttons from A Flair For Buttons also adds some more interest.
Stickers were added to my design here and there and also some wood veneer trees. Again, I added some sequins for more interest.
Now for the good news. The Candy Cane Background is FREE in the Just Nick Store for today, December 14, 2015 only until midnight CST. Use the code CANEFREE to grab it in the store today. All the cut files I used on my layout are also available to purchase in the Just Nick Digital Cut Files Store.
Wednesday, December 9, 2015
Rudy
Hello friends! Happy Wednesday! Today I am on the A Flair For Buttons blog sharing a layout of a cute reindeer that I saw recently at a Christmas market in the country near my home. There was a photo area set up for children and their families to get their photos taken with Santa and his reindeer. I thought this guy Rudy was so cute that I had to snap a photo.
I couldn't wait to use these flair buttons that I have been hoarding for the perfect layout. The time has come to take out the Christmas Wishes 1 Flair Set. Isn't it adorable? I love that cute little red nosed reindeer and Santa Claus with Rudolph.


I also used the red Christmas Tree flair button from the Season's Greetings Flair Set

I also used the reindeer cut file, which is one of the December FREE cut files designed by Nicole Nowosad on the Scrapbook And Cards Today blog.
I love all the holiday flair buttons in the shop don't you? Be sure and check them all out for all your holiday scrapping projects in the store here.
Happy creating!
I couldn't wait to use these flair buttons that I have been hoarding for the perfect layout. The time has come to take out the Christmas Wishes 1 Flair Set. Isn't it adorable? I love that cute little red nosed reindeer and Santa Claus with Rudolph.
| Christmas Wishes 1 Flair Set |
I also used the red Christmas Tree flair button from the Season's Greetings Flair Set
| Season's Greetings Flair Set |
I also used the reindeer cut file, which is one of the December FREE cut files designed by Nicole Nowosad on the Scrapbook And Cards Today blog.
I love all the holiday flair buttons in the shop don't you? Be sure and check them all out for all your holiday scrapping projects in the store here.
Happy creating!
Sunday, December 6, 2015
New Cut Files For The Week!


Aren't they perfect for the holidays? They are available for download in the shop here.
Also, be sure and check out the Just Nick blog every weekday from now until December 18 for a free cut file for each day. No purchase necessary.
Happy creating!
Saturday, December 5, 2015
December 2015 Reveal Day At My Creative Scrapbook
Hello friends! Happy Saturday! On the fifth day of each month, My Creative Scrapbook reveals all the kits for that month so today it is reveal day of the December 2015 kits.
I am honored, for the fifth consecutive month, to be a part of the reveal. Wow! What gorgeous kits they all are! I was given the December Main Kit to create with and I was easily able to create four layouts with plenty of product left over to create even more layouts and cards. What a good value! Here are my four layouts:
The December Main Kit is beautiful.
To see the entire December 2015 Kits reveal, go here to the design team gallery and be inspired!
Thanks for stopping by and be sure to order your December 2015 kits today here.
I am honored, for the fifth consecutive month, to be a part of the reveal. Wow! What gorgeous kits they all are! I was given the December Main Kit to create with and I was easily able to create four layouts with plenty of product left over to create even more layouts and cards. What a good value! Here are my four layouts:
The December Main Kit is beautiful.
Not only is the December 2015 Main Kit gorgeous but look at these!
To see the entire December 2015 Kits reveal, go here to the design team gallery and be inspired!
Thanks for stopping by and be sure to order your December 2015 kits today here.
Thursday, December 3, 2015
My Creative Scrapbook December Sneak Peaks
Hello friends! Happy Thursday! I'm sure there are plenty of folks preparing for the holidays, but I wanted to stop in a let you know that the sneak peeks of all the December 2015 kits at My Creative Scrapbook are here and I am excited to be guest designing again for December. I was given the December Main Kit to create with and let me tell you that it is absolutely gorgeous! Here are four sneak peeks of my four layouts.
Here are the design team's sneak peeks with the December Main Kit:
My Creative Scrapbook has four kits each month so there is one for every paper crafter's style.
Have I piqued your interest? The big reveal of all the December 2015 kits at My Creative Scrapbook and the design team gallery will be on December 5 and I know that you will love what all these talented paper crafters have created so do check back and be sure and order your kits.
Have a great day! Happy creating!
Subscribe to:
Posts (Atom)


