|
| My Creative Scrapbook October Creative Kit |
Here is the layout...
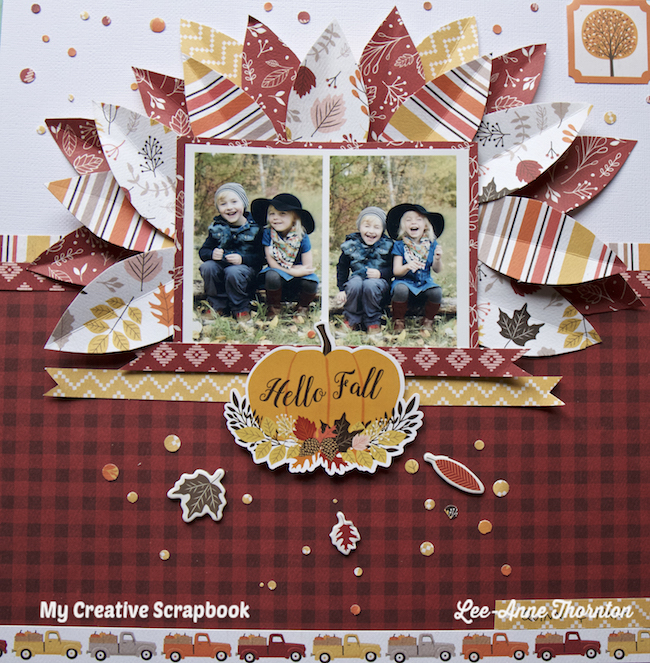
I really love the warm colors in the October Creative Kit. It just screams autumn and Thanksgiving. This layout looks complicating, but I assure you that it is a fairly simple layout to create. The bonus is that to create this layout, it doesn't require any fancy tools.
Let's get started. You will need:
Basic Supplies For This Layout
Adhesive (a tape runner works well. I used my Scotch ATG gun)
Bone folder (to score the hand cut leaves)
Cardstock (12 X 12 sheet of white textured cardstock)
Foam dots, squares, or tape (for adding dimension to the hand cut leaves and the Hello Fall sticker)
Liquid Adhesive (for the paper confetti pieces. I use Tombow Liquid Adhesive)
Paper Punch (a hole punch, confetti punch or the Fiskars Swiss Cheese Border Punch - I used the Fiskars Swiss Cheese Border Punch)
Paper trimmer (to trim the patterned papers)
Pen (black fine line pen)
Pencil (to hand draw leaves)
Scissors (to hand cut leaves)
One photo measuring 5 X 3 1/2 inches or two photos combined to measure 5 X 3 1/2 inches.
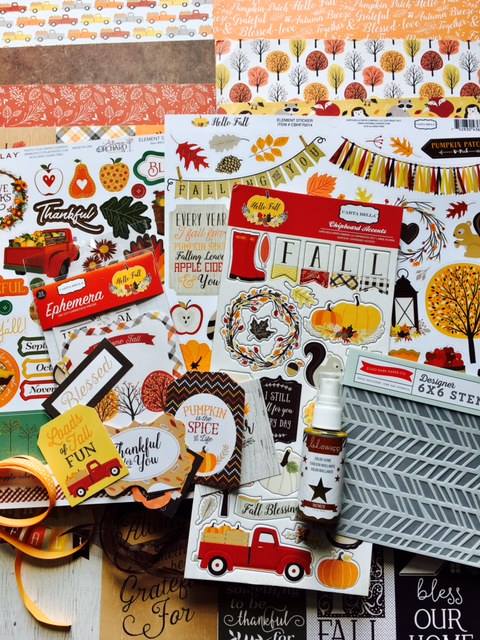
October Creative Kit
1 - 12 inch by 7 1/4 inch piece buffalo check patterned paper (the burgundy and black check piece of paper)
1 - 12 inch by 1/2 inch strip of the multi-colored pickup truck patterned paper
1 - 12 inch by 1/2 inch strip of the yellow and white patterned paper
2 - 12 inch by 1/2 inch strips of the burgundy and white patterned paper with the diamond design
1 - 12 inch by 1/2 inch strip of the multi-colored striped patterned paper
1 - 5 1/4 inch by 4 inch piece of the burgundy and white patterned paper with the tree branch print
Several pieces of patterned papers for the hand cut leaves (see layout above for example)
Leaf chipboard stickers (from the chipboard sticker pack)
Hello Fall Sticker (from the sticker sheet)
Orange tree die cut (from the ephemera pack)
Instructions
Begin with the 12 X 12 sheet of white textured cardstock.
Adhere the 12 inch by 7 1/4 inch piece of buffalo check paper to the bottom of the white cardstock.
Mat the photos on a piece of burgundy and white patterned paper, with the tree branch print, with foam squares to the backside near the middle of the photos. This will ensure that the hand cut leaves will tuck behind the photos later.

Add the multi-colored strip of paper of striped paper to the top edge of the buffalo check paper and adhere.
Add the burgundy and white diamond print strip of paper directly below the multi-colored striped paper strip and adhere.
Add another burgundy and white diamond print strip, which has been cut on both edges with scissors, to make a banner. Adhere to the bottom of the photos as shown.
Add the yellow and white patterned paper strip, which has been cut on both edges with scissors, to make a banner. Adhere below the burgundy and white diamond print strip as shown.
On several sheets of patterned paper from the kit, hand draw some leaf shapes with a pencil and cut out with scissors. I cut out several leaves. Check out the layout to see approximately how many leaves I cut. I used four different patterned papers.


With a bone folder, score down the middle of each hand cut leaf and bend.

Begin tucking the scored leaves behind the photos as shown below.


Next I added four multi-colored striped leaves to fill in the spaces.

Finally, I added the burgundy and red patterned paper, with the tree branch print, behind the other leaves as shown. Be sure to fill in the empty spaces between the leaves.

Finally, I added two yellow and white patterned paper leaves behind the other paper leaves as shown.


Now it's time to embellish the layout with paper confetti. I used the Swiss Cheese Border Punch and scraps of the patterned paper from the kit and punched out several circles.

I arranged the paper confetti on the white card stock background randomly and applied a tiny bead of liquid adhesive to the back of each circle of paper confetti and stuck them down.


I added more paper confetti on top of the buffalo check paper and applied a bead of liquid adhesive and glued them down. I adhered three leaf chipboard stickers. Next, I added the "Hello Fall" sticker that I popped up with some foam squares to the back and adhered it to the middle of the layout below the photos and on top of the banner paper strips.
Adhere the paper strip of the pickup trucks to the bottom edge of the buffalo check paper. On a small strip of white and yellow patterned paper, I wrote the names of the children with a black fine line pen.

Finally I added the orange tree die cut to the top right corner of the layout.

Voila! The layout is now complete!
I hope you enjoyed my tutorial and give this a go. It may be a little time consuming, but the results are worth it.
Thanks for stopping by and be sure to check out the October Creative Kit and all the kits at My Creative Scrapbook. Each month there are four kits to suit any scrapbooker's style.
Happy scrapping!