Showing posts with label Easter. Show all posts

Saturday, May 5, 2018

Reveal Of The May Kits

Hello friends! Happy National Scrapbook Day!

I'm back today with the reveal of all the gorgeous kits for May at My Creative Scrapbook.

May 2018 Main Kit

May 2018 Creative Kit

May 2018 LE Kit

May 2018 Album Kit

I created three layouts and a banner to celebrate Spring with the May Creative Kit.


Thanks for stopping by. Be sure and check out the designer gallery for lots more inspiration at My Creative Scrapbook and order your kits today.

Happy scrapping!


\

Wednesday, May 10, 2017

Easter Memories

Hello friends! I'm back with another layout today for My Creative Scrapbook using the fabulous May Main Kit.


I wanted to create a custom background for this page so I began with a white 12X12 piece of white textured card stock that I brushed completely with some clear gesso. Gesso works like a paint primer and gives the surface some toothiness so that paint adheres better to the surface and it also absorbs the paint better so that the card stock doesn't get too saturated from the paint. 

With my Gelatos, which are creamy pigmented sticks that can be used with water,  I painted with the colors light pink, bubblegum pink, yellow, teal, green and light pink across the card stock and let it dry. Once the background was dry, I splattered it with white acrylic paint thinned down with some water and flicked it with a paintbrush.

Now moving on to the title. For my "Easter Memories" title, I used the cut file that was included in the May kits and went ahead and created the large title in the Silhouette Studio software and then cut it out with my Silhouette Cameo first on several different patterned papers and then I offset the letters and and cut it out again on white card stock and placed the patterned paper over the white card stock and added some of the cute Easter buttons to the center of the "a" and two "r's" and stuck them down with glue dots.


With my antique sewing machine, I stitched over the large letters three times with pink thread. This ensures that the letters aren't going anywhere and also gives the layout some texture and a homemade feel. 


I printed the 4X6 photo of these cuties and tucked it inside the "Easter" and the "Memories" words of my title.

Some phrase stickers, were added to the bottom of the page as well and the glittered wavy stickers were added to the top and bottom of the page.  I fussy cut out some of the eggs from the patterned paper and added them to the left and right side of the photo with some pop dots to give them some layering and dimension. 


I also added some puffy stickers and some teal glittered triangle stickers to direct the eyes to the photo. 


The bunny stickers were also pop dotted on the left and right side of the "Easter" word.


I hope you enjoyed my layout. It's fun to create custom backgrounds with a little paint and also fun to create a large title for the layout that makes it the overall focal point to the page.

Be sure and order your May kits at My Creative Scrapbook today.  Have a lovely day!

Monday, May 8, 2017

Easter Family Memories

Hello friends! I hope you had a good weekend and were able to spend some time doing what you love and if you are a scrapbooker, I hope you were able to partake in some of the International Scrapbook Day festivities that were happening everywhere.

Today I wanted to share another layout from the May Creative Kit at My Creative Scrapbook.


For this particular layout, I used the negative of the Alphabet Cut File, a download that is included in the May kits. I cut this large title out on my electronic die cutting machine on a 12X12 piece of textured white card stock and using the negative part of the cut file to create an extra layout.

I added some clear gesso around each large alpha, let it dry and then watercolored around the edge of each alpha with coordinating watercolors in pink, yellow, peach, teal, green and pink. 

With my paper trimmer, I cut lots and lots of paper strips and glued them down onto the backside of the large letters making sure that there were no two papers the same beside each other. 

Once all the large alphas were done, I drew around each letter with a ruler and a fine tip black marker to make the letters of the title stand out even more.


To add the white paint splatters, I covered up the photo with a piece of scrap paper and flicked some watered down white acrylic paint with a paint brush onto the layout to give it more texture and interest.


To make some extra embellishments for this page, I fussy cut some flowers, butterflies and eggs from some of the papers included in the kit. 


The adorable bunny, chick and egg buttons that were included in the kit were placed on the center of some of the large alphas. These were glued down with some glue dots.


Puffy stickers and a  pink heart shaped sticker from the pink alpha sticker sheet were added.


The word "family" was added just above the word "memories" and then I machine stitched it down with some pink thread. When different mediums such as gesso, inks and paints are used I find that stickers don't seem to adhere well and stay put so I often stitch them down to make sure that they aren't going anywhere.


There are some really cute phrase stickers included in the kit that come in mint, light pink and dark pink that I added to the layout.


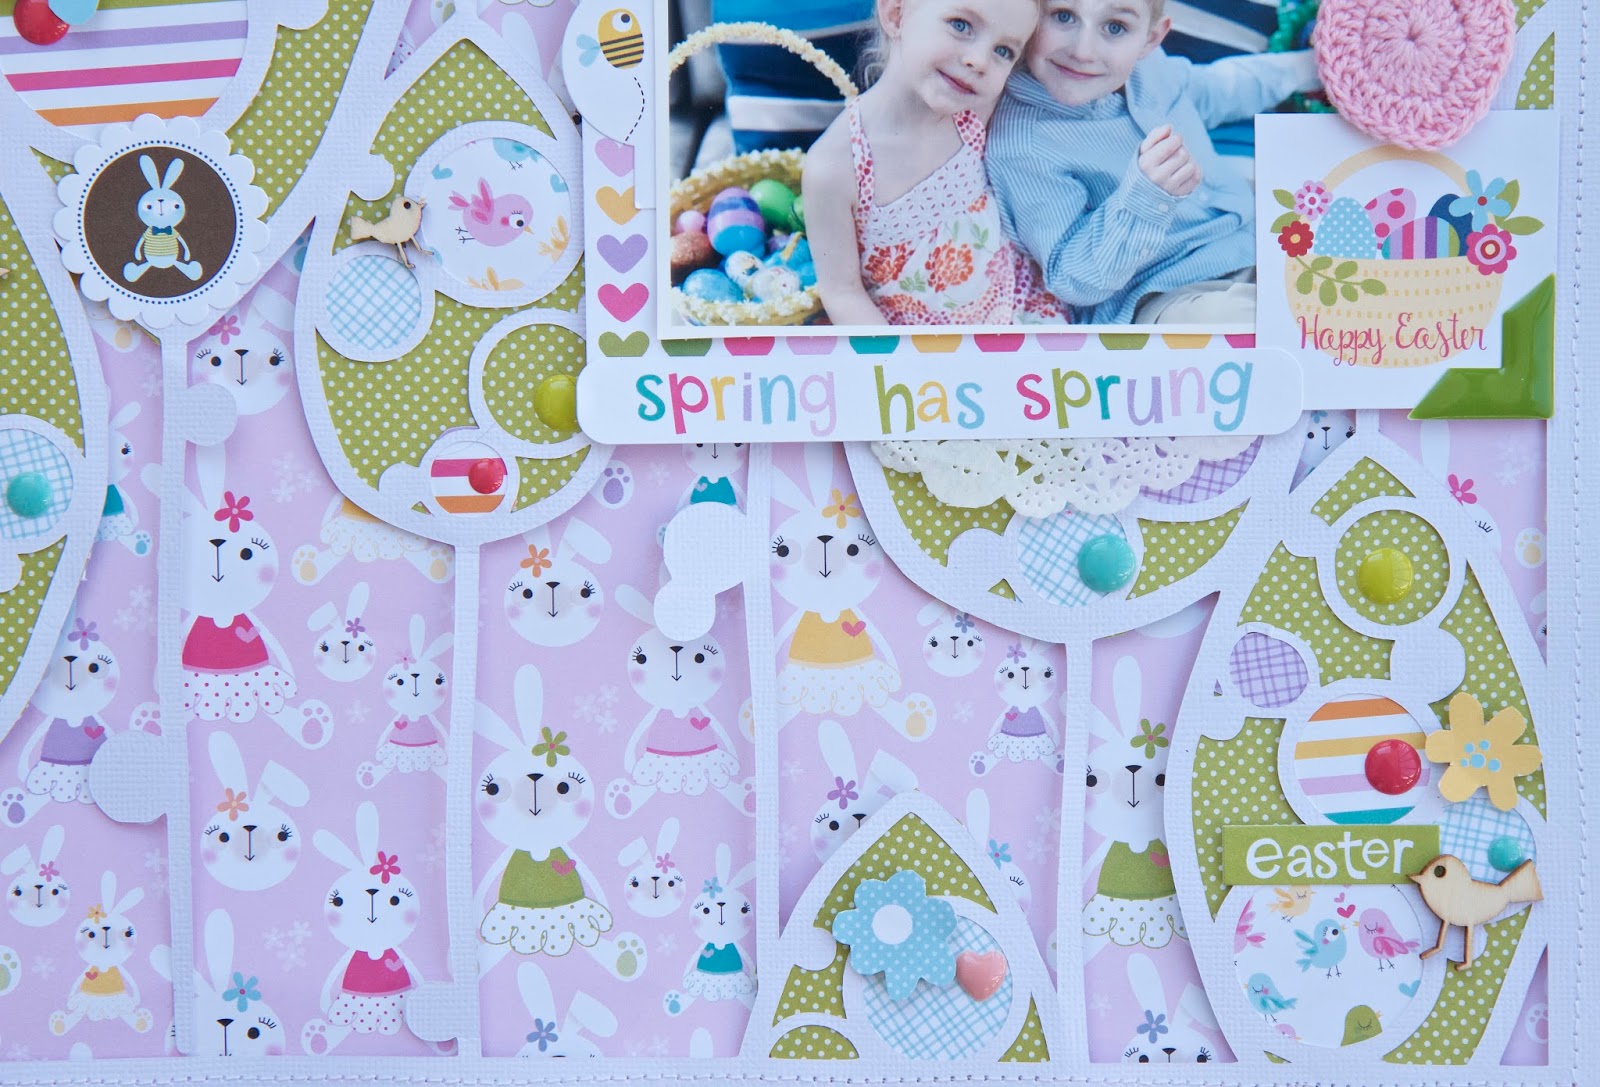
Here are some more closeups


Well there you have it. A layout using the negative piece of a cut file to create a large title that is watercolored and backed with lots and lots of leftover paper strips.

I hope you are inspired to give this technique a try. It's a great way to stretch a cut file and your kit further.

Be sure and check out all the details on how you can purchase your own kit from My Creative Scrapbook. There are four kits each month so there is always one that will suit your style. Happy scrapping!

Wednesday, January 25, 2017

Happy Spring Layout

Hello friends! Today it's all about springtime.  I am so over winter how about you?  Easter is one of my favorite holidays and I thought I would use the Weird Science Background cut file from Just Nick Digital Cut Files


The background cut file looks like  trees to me so since this is a spring themed layout, I backed it with some green polka dot paper and added some spring patterned papers to the circles (all the papers here are from the Sweet Sweet Spring Collection by Bella Blvd.) and also some cute little bird wood veneers that I have had in my stash, some enamel dots, stickers, a crochet heart and fussy cut flowers. 

Here are a few closeups:


To create more depth and dimension, I added some foam adhesive squares to the backside of the "trees".  


Spring just makes me happy and I am looking forward to it. Thanks for stopping by!


Monday, August 22, 2016

Easter Layout

Hello friends! Happy Saturday! Today and I am excited to share an Easter layout that I created of these cuties using the Hashtag Easter Flair at A Flair For Buttons.


I love spring and the soft pastel colors of these flair buttons.  I placed them in a triangle so that it would draw the eyes across the page.


I also used some papers and embellishments from the Bella Blvd. Simply Spring Collection as well as a digital cut file that I cut out with my Silhouette Cameo from Just Nick Digital Cut Files (Half Shell Background)

You can find these Hashtag Easter Flair and hundreds more in the A Flair For Buttons Shop.  


Il_570xN.571080874_pypj


Thanks for stopping by!

Monday, March 14, 2016

Paper House Productions Easter Blog Hop


Hello friends! Today is the Easter Blog Hop at Paper House Productions and I am really excited to participate in my first Paper House Productions blog hop with all the talented ladies on the team.

You should have arrived here from Christine's blog, but if not there are no worries, simply go to the beginning on the list below.

Lee-Anne Thornton (You Are Here)


For my project, I created an Easter Shadowbox.  I began with a white 8X10 inch shadow box that I purchased at my local craft store.  I centered and adhered the Happy Easter Sticker onto pink background paper that I traced and cut to fit the inside of the frame.


After the Happy Easter Sticker was adhered, I added some butterfly stickers and some stickers to the outside of the shadowbox frame in each corner as shown.


Finally I added some light green tulle strips that I hot glued with a glue gun and tied a bow.  This can be hung on a wall or displayed on an easel. This came together quickly and was easy peasey. 

Be sure and enter the giveaway. 


You could win a $25 Gift Certificate from Paper House Productions!

Good luck on the giveaway. Now it's time to hop over to the talented Lisa Moen.  I'm sure she has an amazing project to inspire you.  Happy hopping!

Paper House Productions Supplies Used: