Showing posts with label Halloween. Show all posts

Monday, November 28, 2016

Where The Wild Things Are Pocket Mini Album

Hello friends! Once in a while I like to try new things in this crazy fun scrapbooking world so today I thought I would share a pocket mini album that I created for design team work at Paper House Productions.  I used this cut file in the Silhouette Online store that was created by Lori Whitlock. I cut out the mini album on Silhouette Chipboard with my Silhouette Cameo and once it was assembled, I added the beautiful papers and stickers from Paper House Productions Where The Wild Things Are Papercrafting kit.


I had so much fun creating this album.  A friend of mine has the cutest boy and girl and when I saw the Where The Wild Things Are Paper Crafting Kit from Paper House Productions, I knew I wanted to document their Halloween from this year and last year.

I have a little video that I created to show the completed album.


Thanks for visiting my blog.  I hope you enjoyed my video and check out the Paper House Productions shop and blog. 


Wednesday, November 2, 2016

Paper House Productions Fall/Halloween Blog Hop


Hello Paper House fans! Are you enjoying the Fall/Halloween Blog Hop so far? Today is the second day of the blog hop at Paper House Productions and I am sharing a scary Halloween layout with some of the papers from the Fright Night Collection, some Spooktacular 3D Stickers, Scary Sculpted Stickers and Happy Hauntings Cardstock Stickers.


Chills & Thrills Supplies


This was a fun layout to put together.  My neighbours always create an awesome Halloween display for the frightful night.  My dog actually growled when we walked by their home. LOL.  

For my layout I began with the Book Of Spells paper for my background and then added the large die cut web, which is a cut file from Just Nick Digital Cut Files that I cut out on black card stock with my Silhouette Cameo.  


I matted my photo with various papers from the Fright Night Collection and then added several 3D stickers from the Spooktacular 3D Stickers and some cardstock stickers from the Happy Hauntings Cardstock Stickers.  Finally, I added the title "Chills & Thrills" from the Scary Sculpted Stickers. 


Scary right? I hope you enjoyed my project.  Don't forget to comment on my blog and then be sure to check out Angel's blog to see what she created and comment there and then go to the Paper House Productions blog. 

 Here is what you need to do to be entered to win the entire Fright Night Collection and two Shimmers Lighted Embellishments:


 Now it's time to head on over to the talented Angel's blog for more inspiration. Have a happy day!

Monday, October 24, 2016

Halloween Frames With 3D Shimmers Lighted Embellishments


Hello friends! Today I am sharing a fun Halloween home decor project over at Paper House Productions.  


For my project I created some scary frames to place on my shelf in my studio with the new 3D Shimmers Lighted Embellishments.  They are so cool! I love that I can press them any time and they light up.

Halloween Frames Supply List
You will need:
3 - black 8 X 8 inch frames (I used shadow box frames that come in a 3 pack at Michael's but they don't have to be shadow box frames)
Adhesive - (I used my ATG gun)
Large Paper Trimmer
Paper House Productions Supplies (listed below)
I began with three (3) black - 8 inch by 8 inch square frames and cut my patterned papers down to 7 1/2 inches by 7 1/2 inches and adhered them on top of the glass.
img_5036
I added my 3D Shimmer Lighted Embellishments about one inch from the top of the frame and made sure they were centered and stuck them down also being sure that the ribbon for each of the Shimmers were tucked underneath. This way if you want to repurpose them for hanging in the future, you still are able to use them.
img_5036-version-2
To complete each frame, I added some 3D stickers on the top middle area of each frame and also added some stickers to the paper area and also added the word stickers from the Scary Sculpted Sticker set to the bottom middle of each frame.
img_5036-version-3
I hope you enjoyed my project and are inspired to use these wonderful 3D Shimmers Lighted Embellishments on your next project.  Be sure and check out all the wonderful products at Paper House Productions for your next home decor project. Happy creating!


Monday, November 16, 2015

Bella Blvd. November Bella Buzz Is Here

Hello friends!  I hope you are having a lovely day.

Today the Bella Blvd. has released their November 2015 Bella Buzz newsletter.  I am excited to have another layout included in the Bella Buzz.
My son Clayton was a pirate for a Halloween party when he was nine years old. I thought he made a cute little pirate with his blue eyes if I say so myself.

I used the Max Collection by Bella Blvd. for this layout and embellished with some hand stitching.  One of my favorite things to embellish my layouts with is flair buttons.  All my flair buttons are from A Flair For Buttons.


To download your free issue of the Bella Buzz you can download it here.  There is a giveaway also.  You can also sign up to subscribe to the newsletter here. To read all the previous Bella Buzz issues you can find them here.

Enjoy your day! Happy creating!

Tuesday, November 3, 2015

Guest Designer At Scrapbook And Cards Today Magazine

Hello friends! Today I am very honored to be a guest designer on the Scrapbook And Cards Today Magazine Blog using the November Freebie Digital Cut File designed by the amazingly talented Nicole Nowosad.


I decided to create a Halloween layout of my friend's two little cuties.

To explain my design process, I cut the cut file on a 12 X 12 piece of black card stock with my Silhouette Cameo, turned it over onto the backside and backed the design with some patterned papers from the Crate Paper After Dark Collection.  Then, I adhered it to a white 12X12 card stock background that I first watercolored with some Tim Holtz Dried Marigold Distress Ink.  To embellish the layout, I glued some adorable bat sequins, orange sequins and star sequins that are also from the After Dark Collection, and placed them randomly around the page.  To complete the layout, I splattered with some Liquitex Black India Ink, let it dry and then added three  flair buttons from A Flair For Buttons.  To make the flair buttons pop and to give them more interest and texture, I wrapped the flair buttons with orange sewing thread.

Here are more layout closeups:


Here is the Scrapbook And Cards Today Magazine November 2015 Freebie Cut File

Scrapbook And Cards Today November 2015 Freebie Digital Cut File

Thanks for stopping by and hope you have a great day!

Monday, December 1, 2014

Stuck Sketches December 1 Sketch Reveal

Hello friends! It's December and today is the sketch reveal at Stuck?! Sketches for December 1.  I decided to create a halloween layout with the Bella Blvd. Halloween Magic Collection.  These cute papers and embellishments were perfect.  I love the little chipboard shapes of Frankenstein and the mummy.


Here is the sketch designed by Laura Whitaker.


Why don't you join the challenge and create a layout for a chance to win a great prize from Scrap Matts and Linnie Blooms.  All the details and the full design team reveal can be found here. 

I hope you enjoyed your visit.  Take care and see you soon!

Thursday, October 30, 2014

Practical Scrappers October Blog Hop


Happy Halloween! You should have arrived here from Cheryl's blog but if not, just follow the blog hop list below.

Lee-Anne http://lee-annelovethejourney.blogspot.com/  YOU ARE HERE :)

Today at Practical Scrappers we are having a Halloween Blog Hop and the only requirement is to make a project with some of our stash.  I dug through all my Halloween papers and decided to make some art for my wall to put up in my front hall.  I used the Oct. 31 Collection by Fancy Pants Designs.  It's been a while since I have created with rub ons and overlays.  This is what I came up with.


For the haunted house, I used a cut file designed by Samantha Walker in the Silhouette Online Store.  I cut it out with my Silhouette Cameo and then backed the windows, doors and porch with some different papers and then added a sticker and some rub ons and overlays.  I used a shadow box frame that I had to frame the project.


You have reached the end of the blog hop.  I hope you are inspired by all of the creations today on the hop. I know I am. Thanks for stopping by and have a safe and happy Halloween!

Lil Pumpkin Layout

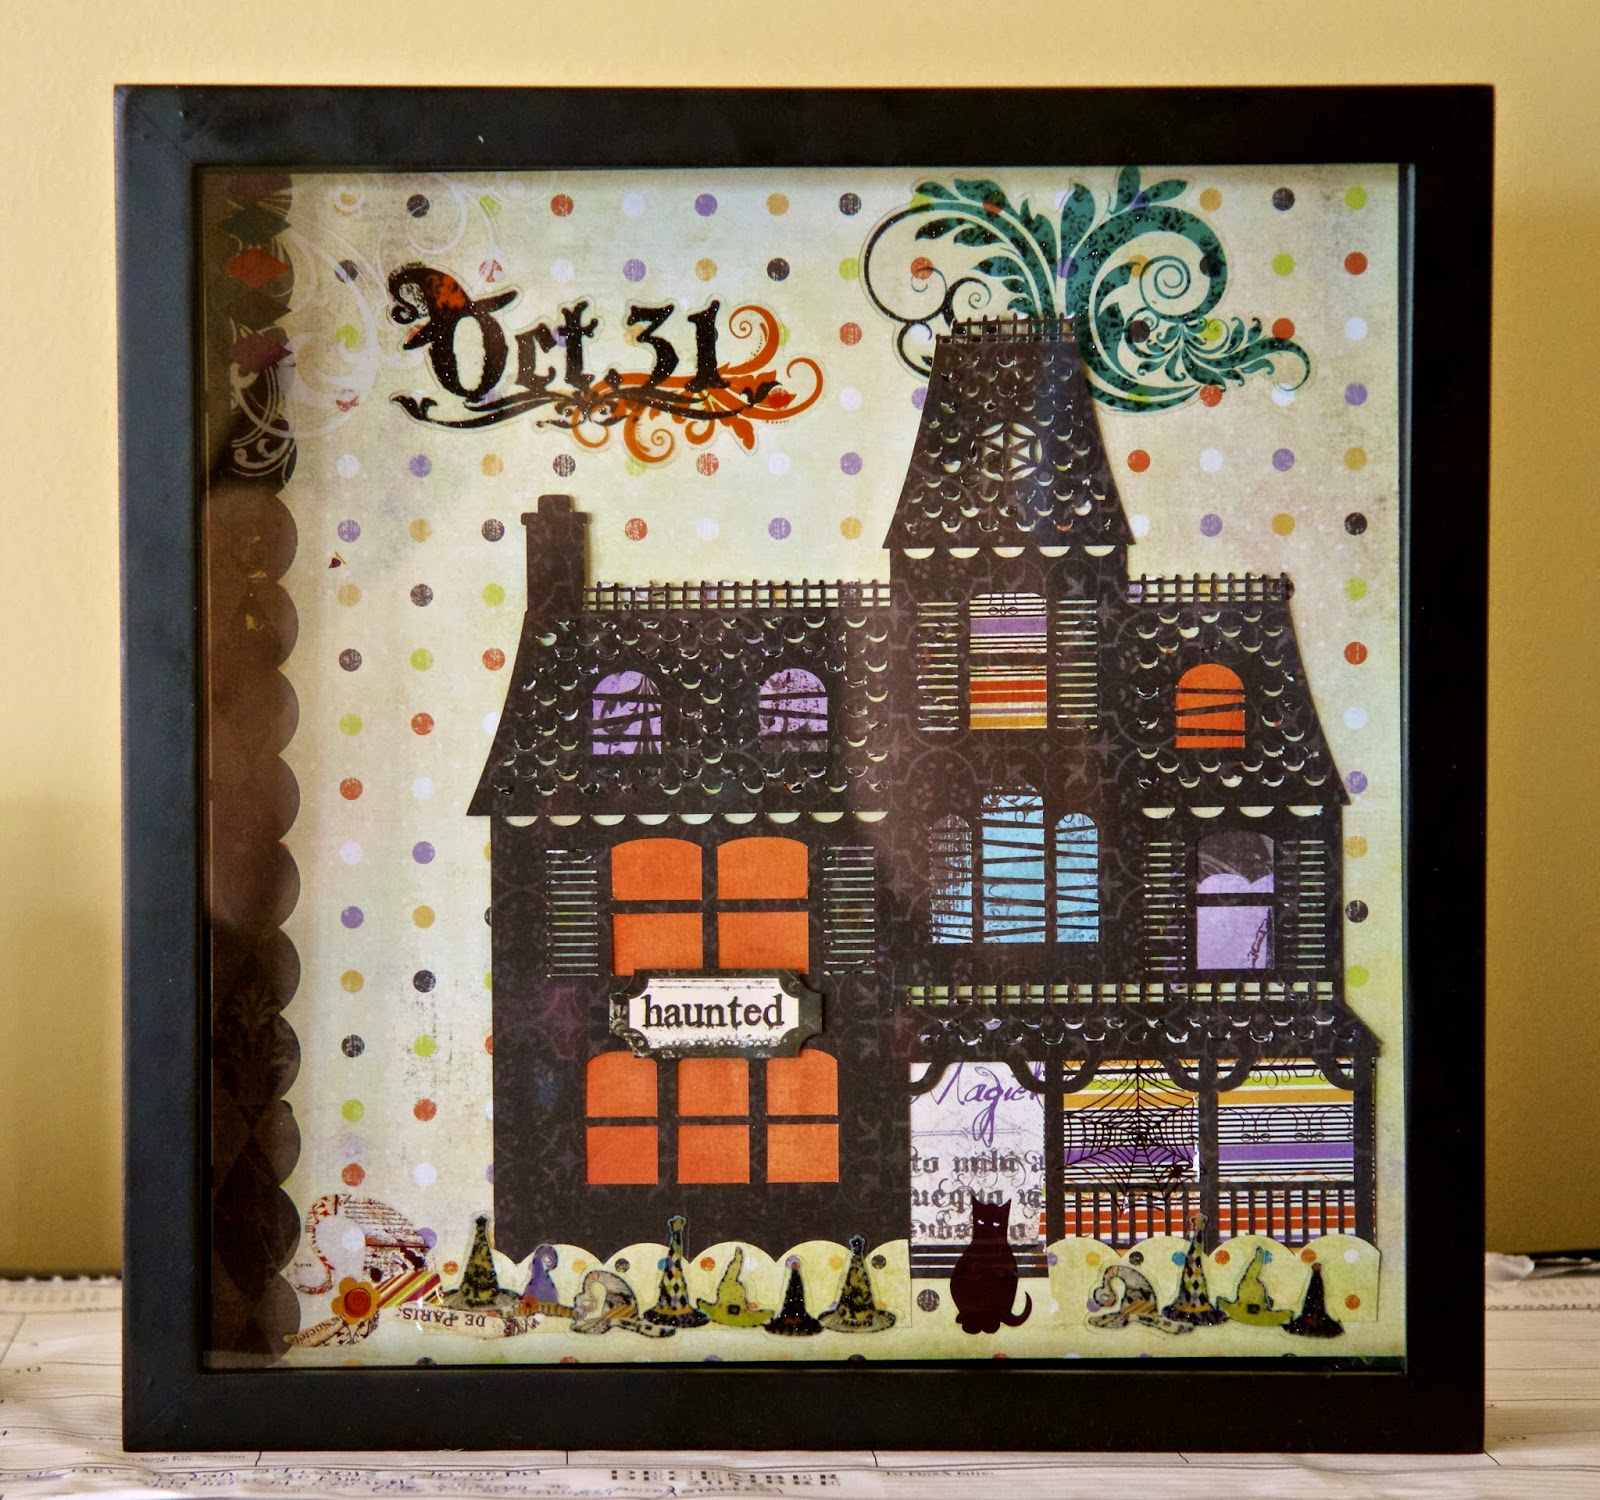
Hello followers! So glad you came by to visit.  Today I am sharing a Halloween layout using the Halloween Cut Files and Printable from The Cut Shoppe.


I used the Happy Haunting Printables for the Pumpkin Patch 3X4 card and the spiderweb.


The Pumpkin cut file was from a free cut file, back in September, for The Cut Shoppe newsletter subscribers only so if you aren't a subscriber to The Cut Shoppe Newsletter, now is the time to subscribe to be in the loop for all the happenings and free cut files.


For the title, I used the A To The Z Alpha cut file and dry brushed some distress paint over the alphas to make it stand out more.


All the patterned papers and stickers are from the Doodlebug Designs Ghouls And Goblins Collection.

There is a giveaway and sale on these 4 Halloween Cut Files and the Printable so be sure and visit The Cut Shoppe Blog for all the details.  The sale and giveaway is on now until November 3, 2014.


Thanks for stopping by and sadly this is my last design team post for The Cut Shoppe.  It's been so much fun but in the future, I am sure you will see many layouts of mine using the cut files and be sure to check out the new design team, which will debut tomorrow.  I can't wait to see what these talented ladies create.  I'm sure it will be great.  Thanks for stopping by and Happy Halloween!